When it comes to making a chicken pot pie, there’s one question that stumps even seasoned cooks: Should you prebake the bottom crust of a chicken pot pie? It’s a debate that sparks arguments in kitchens everywhere because, let’s face it, nobody wants a soggy bottom crust. In this article, we’ll dive deep into this topic, explore the benefits and challenges of prebaking, and share practical tips to make your pot pie a masterpiece. Ready? Let’s roll up our sleeves and dig in! 🥧
Should You Prebake the Bottom Crust of a Chicken Pot Pie? The Classic Dilemma
Picture this: You’ve poured your heart (and a lot of butter) into crafting the perfect chicken pot pie. But when it comes out of the oven, the bottom crust is a wet, mushy disaster. Sound familiar? That’s the classic pot pie dilemma.
The issue boils down to one thing—moisture. The juicy, savory filling often releases steam and liquid, which can seep into the crust and ruin its texture. If you’re using a store-bought crust, you might be wondering whether store-bought chicken pot pie is healthy and how it compares to homemade options.
This leads us to the million-dollar question: Should you prebake the bottom crust?
Why Should You Prebake the Bottom Crust of a Chicken Pot Pie?
How Prebaking the Bottom Crust Enhances Pot Pie Texture
Let’s be honest. The crust is just as important as the filling—if not more. A crisp, golden-brown crust provides the perfect contrast to the creamy filling. Without it, the dish feels incomplete, like a sandwich with soggy bread. Ew, right?
Common Complaints About Soggy Bottom Crusts
Most chicken pot pie fails can be traced back to the bottom crust. Here are a few common issues people face:
- Soggy texture: Nobody wants a bottom crust that feels like wet cardboard.
- Uneven cooking: The top crust is golden, but the bottom is undercooked.
- Stickiness: The filling clings to the crust, making it hard to serve neatly.
Understanding Prebaking for Chicken Pot Pie Crust Perfection
What Is Prebaking?
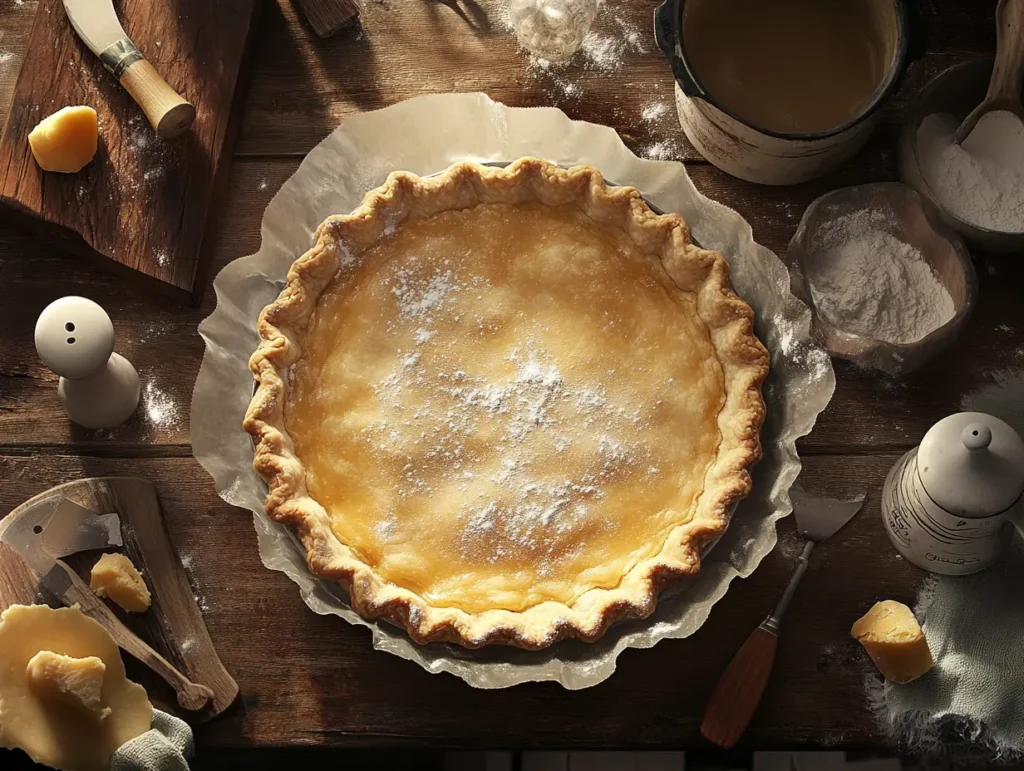
Prebaking, also known as blind baking, is a technique where you partially or fully bake the crust before adding the filling. This creates a barrier that helps the crust hold up against the filling’s moisture. Think of it as putting on a raincoat before stepping into a storm. 🌧️
Pros and Cons of Prebaking for Pot Pies
Pros:
- Crisper crust: Say goodbye to soggy bottoms.
- Even cooking: Ensures the crust is fully baked.
- Customizable texture: You can control how crispy you want it.
Cons:
- Extra time: It’s an additional step in an already lengthy recipe.
- Risk of overbaking: If not timed well, the crust edges can burn.
- Skill required: Improper prebaking can lead to cracks in the crust.
Factors That Influence Crust Texture
Filling Moisture Content and Its Impact
Ever noticed how some fillings are watery while others are thick? The moisture level in your filling is a major factor. For example, if your filling is too runny, it can saturate the crust no matter how well you prebake it. Using a thicker filling can work wonders.
Crust Thickness: Too Thin or Too Thick?
Striking the right balance with crust thickness is like walking a tightrope. A thin crust might crisp up nicely but could tear under the weight of the filling. On the flip side, a thick crust could turn doughy if not baked thoroughly. Aim for about 1/8 inch thickness for the sweet spot.
Methods to Keep the Bottom Crust from Getting Soggy
Using Pie Weights for Even Baking
Pie weights are your best friends when prebaking. They keep the crust from puffing up or shrinking. You can use ceramic weights, dried beans, or even uncooked rice. Just line the crust with parchment paper, add the weights, and bake it halfway.
Pro Tip: Don’t skip the weights, or your crust might balloon up like a hot air balloon. 🎈
Adding a Barrier Layer: Egg Wash or Breadcrumbs
One smart trick is brushing the crust with an egg wash before prebaking. This creates a seal that keeps the filling’s moisture at bay. Alternatively, sprinkling breadcrumbs or crushed crackers can also act as a barrier.
Another factor to consider is how the overall pie is baked. If you’re making a Pillsbury-style chicken pot pie, you might find that some store-bought crusts have different baking requirements that impact the bottom crust texture.
Preheating the Baking Dish for Better Results
Did you know starting with a hot baking dish can help the crust cook faster and prevent sogginess? Simply preheat your baking dish in the oven while preparing the crust.
Should You Always Prebake the Bottom Crust?
When Prebaking Is Essential
- Moist fillings: If your filling is on the runnier side, prebaking is a must.
- Serving presentation: If you want clean slices, a crisp crust is non-negotiable.
- Large pot pies: Bigger pies often need a sturdier crust to support the filling.
Cases Where Prebaking May Be Skipped
- Thicker fillings: If your filling is dense and not too watery, you can skip prebaking.
- Shortcuts: Using a ready-to-use crust? Some store-bought options don’t require prebaking.
FAQs: Answering Common Questions About Chicken Pot Pie Crusts
How to Keep the Bottom Crust from Getting Soggy?
The key lies in prebaking, choosing the right filling consistency, and sealing the crust with an egg wash.
Should You Prebake the Bottom Pie Crust First?
It depends! For most homemade pot pies, prebaking ensures a crispy crust.
Should I Prebake the Bottom Crust for Pot Pie?
Yes, especially if you’re using a moist filling. It’s worth the extra effort!
How to Make Sure the Bottom of the Pie Crust Is Cooked?
Prebake it partially, and then bake the entire pie on a lower oven rack to ensure even heat distribution.
Nutrition Facts for a Chicken Pot Pie
| Nutrient | Quantity (Per Serving) |
|---|---|
| Calories | 450 |
| Protein | 18g |
| Carbohydrates | 35g |
| Fats | 20g |
| Saturated Fat | 8g |
| Fiber | 3g |
Step-by-Step Guide: How to Prebake a Chicken Pot Pie Crust

If you’ve decided to prebake your bottom crust, you’re in for a treat. This step is a game-changer, and it’s easier than you might think. Let’s break it down into simple steps so you can master the art of prebaking. 🥧
Preparing the Dough for Prebaking
- Roll It Out Just Right: Roll your dough to about 1/8 inch thickness. Too thin, and it might tear; too thick, and it might not cook properly.
- Fit It Into the Dish: Gently press the dough into your baking dish. Avoid stretching it, as this can lead to shrinkage during baking.
- Trim and Tidy: Use a knife or kitchen scissors to trim excess dough, leaving a slight overhang to account for shrinkage.
- Prick with a Fork: Poke tiny holes across the bottom and sides. This helps steam escape and prevents bubbling.
Pro Tip: Chill the crust in the fridge for 15 minutes before baking to reduce shrinkage.
Baking the Crust Without Overcooking
- Preheat the Oven: Set your oven to 375°F (190°C). A hot oven is essential for crisping the crust.
- Add Weights: Line the crust with parchment paper or foil, then add pie weights, dried beans, or uncooked rice. This prevents the crust from puffing up.
- Partial Bake: Bake the crust for about 15 minutes. Remove the weights and parchment, then bake for another 5 minutes to dry out the bottom.
- Cool It Down: Let the crust cool slightly before adding the filling. This prevents it from softening too quickly.
Ensuring a Perfect Seal with the Filling
- Brush with Egg Wash: Before prebaking, brush the crust with a lightly beaten egg. This creates a barrier that locks out moisture.
- Layer Smartly: Consider adding a thin layer of breadcrumbs or cheese before the filling for extra protection.
- Pour Carefully: Add your filling gently to avoid breaking the crust.
Alternative Methods for Achieving a Crisp Bottom Crust
If prebaking feels too time-consuming, don’t worry! There are other tricks up your sleeve to get that coveted crispy bottom crust.
Using Store-Bought Crusts: Tips and Tricks
Store-bought crusts can be a lifesaver when you’re short on time. Here’s how to make the most of them:
- Look for Quality: Choose a crust labeled “deep dish” or “flaky” for better results.
- Partially Bake Anyway: Even store-bought crusts benefit from a quick prebake.
- Customize It: Sprinkle a little flour or cornstarch at the base to absorb extra moisture.
Adjusting Oven Temperatures and Baking Times
Temperature plays a big role in crust texture. Here’s how to fine-tune your baking process:
- Start Hot, Then Lower: Begin baking at 425°F (220°C) for the first 15 minutes, then reduce to 375°F (190°C) for the rest.
- Use a Baking Stone: Place your pie dish on a preheated baking stone to ensure even heat distribution.
- Bake on the Bottom Rack: This maximizes heat exposure to the base of the crust.
Fun Fact: A baking stone works like magic, turning your home oven into a mini brick oven! 🧱
Common Mistakes When Prebaking a Crust
Even the pros slip up sometimes. Here are common mistakes to avoid when prebaking your chicken pot pie crust:
Overcooking or Burning the Edges
It’s easy to burn the edges while trying to crisp up the bottom. Avoid this by:
- Using a pie shield or aluminum foil around the edges during prebaking.
- Checking frequently during the last few minutes of baking.
Not Using Enough Weights for Even Baking
If you skimp on pie weights, the crust may puff up unevenly. Always use enough weights to cover the bottom entirely.
Skipping the Cooling Step
Pouring filling into a hot crust can undo all your hard work by softening the bottom. Give the crust a few minutes to cool before adding the filling.
Quote: “A great pot pie isn’t born in haste. Patience is the secret ingredient.” 🍴
Expert Tips for Making the Perfect Chicken Pot Pie
Balancing Moisture Levels in the Filling

The filling is the heart of a chicken pot pie, but too much moisture can sabotage your crust. Here’s how to strike the perfect balance:
- Thicken with Flour or Cornstarch: Add a teaspoon or two to your filling to soak up excess liquid.
- Drain Excess Broth: If your filling looks soupy, strain out some liquid before pouring it into the crust.
- Cook Down the Filling: Simmer the filling to reduce moisture while enhancing flavor.
Choosing the Right Baking Dish
The type of dish you use can also impact the crust:
- Glass Dishes: Allow you to monitor browning.
- Metal Pans: Conduct heat well, ensuring an even bake.
- Ceramic Pans: Retain heat but may require longer cooking times.
Pro Tip: Avoid disposable aluminum pans—they often produce uneven results.
Should You Prebake the Bottom Crust of a Chicken Pot Pie?
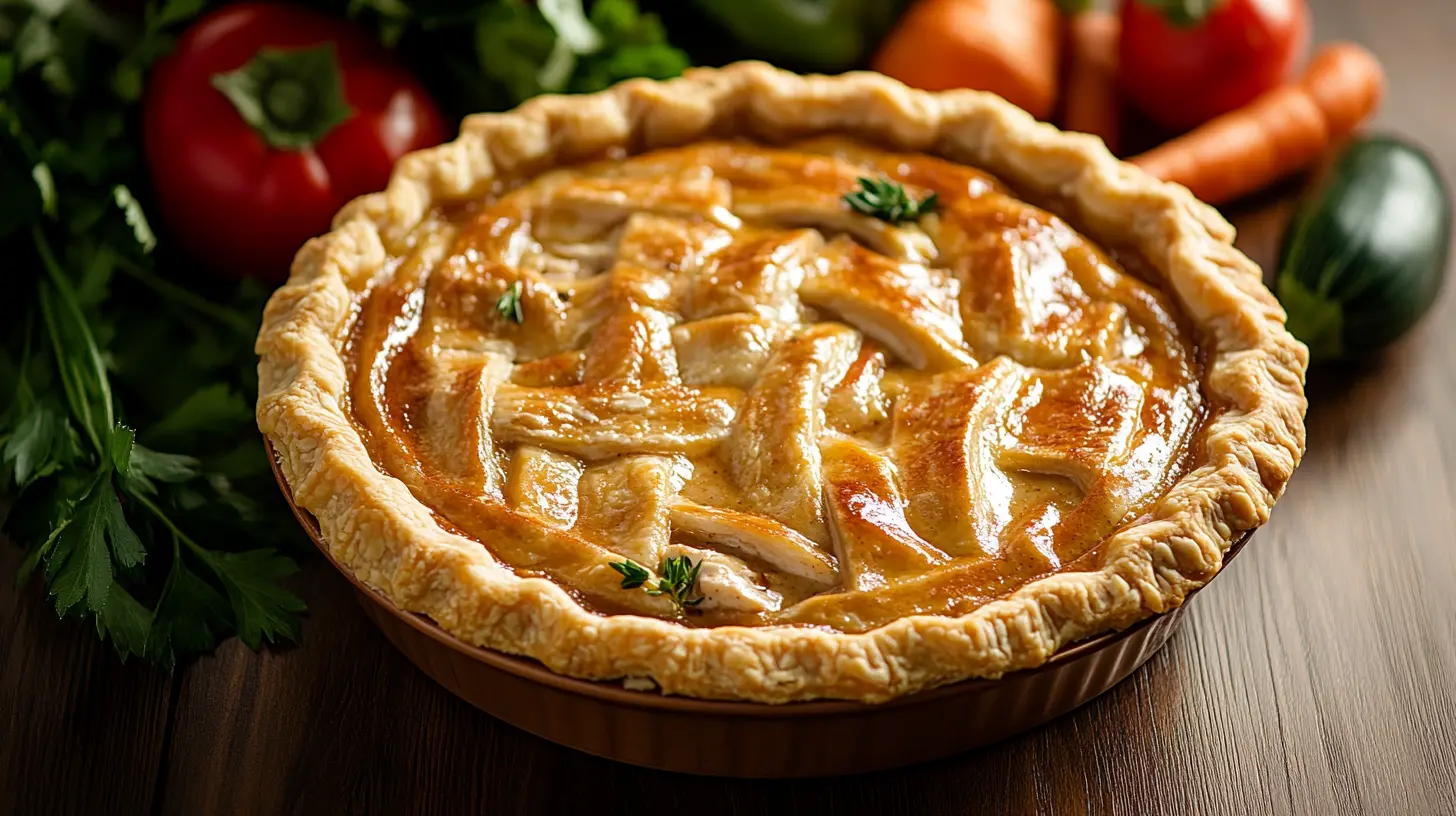
So, should you prebake your crust? In most cases, the answer is yes! Prebaking ensures a crispy, golden crust that stands up to the creamy filling. But if you’re short on time or working with a less moist filling, alternative methods can still yield great results.
Emoji Wrap-Up: Prebaking is like giving your pot pie a head start in the oven race! 🏁
FAQs: Answering Common Questions About Chicken Pot Pie Crusts
There are always a few burning questions when it comes to making the perfect chicken pot pie. Let’s tackle some of the most common ones so you can bake with confidence! 💡
How to Keep the Bottom Crust from Getting Soggy?
This is the golden question, right? The key to avoiding a soggy bottom is to:
- Prebake the crust: Even a partial prebake creates a strong foundation.
- Seal the crust: Use an egg wash, breadcrumbs, or even grated cheese as a barrier.
- Thicken the filling: Ensure your filling isn’t too watery before it goes into the crust.
Should You Prebake the Bottom Pie Crust First?
If you’re aiming for a crispy, fully cooked bottom crust, prebaking is the way to go. It’s especially important for homemade pot pies with a high moisture content.
Should I Prebake the Bottom Crust for Pot Pie?
Yes, especially for deep-dish or traditional chicken pot pies. Prebaking ensures your crust is crisp, even, and sturdy enough to handle the filling.
How to Make Sure the Bottom of the Pie Crust Is Cooked?
To guarantee a perfectly cooked bottom crust:
- Bake on the bottom oven rack for direct heat.
- Use a glass or metal dish to monitor and ensure even browning.
- Consider adding a baking stone underneath for extra heat retention.
Expert Tips for Crafting the Perfect Chicken Pot Pie
Prep Ahead to Save Time
Making a chicken pot pie can feel like a marathon, but a little prep work can make the process smoother:
- Make the dough in advance: Store it in the fridge for up to two days or freeze it for up to a month.
- Pre-cook your filling: This not only saves time but also reduces excess moisture.
- Chop and measure ingredients ahead of time: Cooking is faster when everything is ready to go!
Layer for Success
Want to elevate your chicken pot pie game? Layering is key:
- Start with a crispy, prebaked crust.
- Add a thin layer of breadcrumbs, cheese, or mashed potatoes before the filling.
- Pour in the perfectly balanced filling.
- Top with a flaky pastry lid and seal it tightly to prevent leaks.
Experiment with Fillings
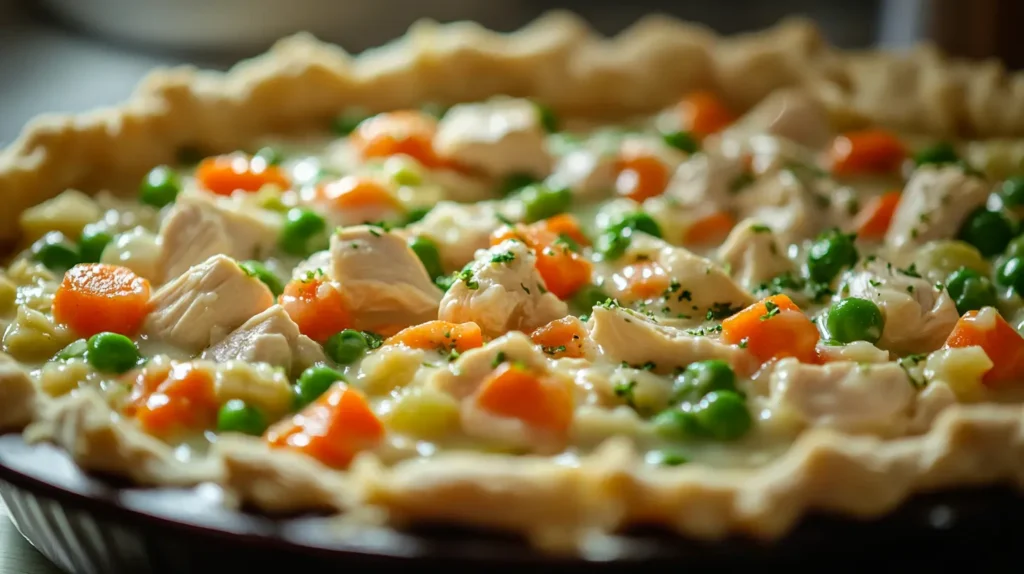
While the classic chicken, carrots, and peas combination is a crowd-pleaser, don’t be afraid to get creative:
- Swap chicken for turkey for a post-holiday twist.
- Add mushrooms, spinach, or sweet potatoes for a unique flavor.
- Experiment with spices like thyme, rosemary, or paprika to jazz up your pot pie.
Nutrition Facts for a Homemade Chicken Pot Pie
Making your chicken pot pie at home not only guarantees freshness but also allows you to control the nutritional content. Here’s a rough breakdown:
| Nutrient | Quantity (Per Serving) |
|---|---|
| Calories | 450 |
| Protein | 18g |
| Carbohydrates | 35g |
| Fats | 20g |
| Saturated Fat | 8g |
| Sodium | 750mg |
| Fiber | 3g |
| Sugars | 4g |
Note: These values can vary depending on your ingredients, so be sure to adjust for your recipe.
Final Thoughts: Should You Prebake the Bottom Crust?
So, let’s revisit the big question: Should you prebake the bottom crust of a chicken pot pie? The answer is a resounding yes—most of the time. Prebaking ensures that your crust is crisp, golden, and sturdy enough to complement the creamy filling. It’s the secret to turning a good chicken pot pie into a great one.
But remember, it’s not the only path to success. With tricks like using egg washes, preheated pans, or thicker fillings, you can still achieve a delicious pot pie even without prebaking. The real magic lies in attention to detail and a sprinkle of love. 💕
So, next time you’re in the kitchen, give prebaking a try and watch your chicken pot pie reach new heights of perfection. Your taste buds—and dinner guests—will thank you. 🥧✨

Chicken Pot Pie
Ingredients
Method
- Roll the dough to about 1/8 inch thickness.
- Fit the dough into your pie dish without stretching.
- Trim excess dough, leaving a slight overhang.
- Prick the bottom and sides with a fork.
- Chill the crust in the fridge for 15 minutes.
- Preheat the oven to 375°F (190°C).
- Line the crust with parchment and fill with pie weights.
- Bake for 15 minutes, remove weights and parchment, then bake for another 5 minutes.
- Let the crust cool slightly before adding the filling.
- In a saucepan, heat the chicken broth and add the vegetables.
- Stir in the flour to thicken the mixture.
- Add the shredded chicken and stir until combined.
- Brush the crust with the beaten egg.
- Layer breadcrumbs in the bottom if using.
- Pour in the filling carefully.
- Cover with a top crust, seal the edges, and make slits for steam.
- Bake in the oven for 30 minutes at 375°F (190°C) until golden brown.
- Let the pie cool for a few minutes before serving.
